You Can Chop Up Moss — And Grow an Entire Moss Wall
This guide is created by Green Chapter — Nature Workshop Studio, where we focus on creating living ecosystems through hands-on experience. We share practical insights across terrariums, aquascaping, plants, and natural systems to help you build and care for your own.
How the Japanese Maki-goke technique inspired modern terrarium & paludarium moss growing
There is something strangely satisfying about watching moss slowly take over a surface.
A bare rock becomes soft and ancient. A plain wall slowly turns into a living green background. Driftwood starts looking like it came from a rainforest stream instead of a glass box sitting in your room.
What surprises many people is that some of these moss-covered landscapes begin with something incredibly simple:
tiny chopped-up pieces of live moss.
This traditional Japanese method is known as Maki-goke — often translated as “moss seeding.” Instead of planting moss sheets directly onto a surface, gardeners break moss into fragments and scatter them across soil, stone, or damp surfaces, allowing the moss to slowly regenerate and spread naturally over time.
Today, hobbyists have adapted this centuries-old idea into modern terrariums, paludariums, moss walls, ripariums, and humid planted ecosystems.
And honestly?
It is one of the most fun DIY experiments you can try at home.
The Ancient Japanese Moss Technique

Japan has a long cultural relationship with moss.
In old temple gardens, shaded stone paths, forest courtyards, and mountain shrines, moss was not treated as a weed. It was appreciated as a living layer that softened landscapes and made them feel aged, calm, and connected to nature.
One of the most famous examples is Saihō-ji — often called “The Moss Temple” — where entire landscapes are covered in thick carpets of moss that have slowly developed over decades and centuries.
Gardeners discovered that moss did not always need to be transplanted as large sheets. Tiny fragments scattered onto damp surfaces could slowly regenerate and spread naturally.
That was the foundation of the Maki-goke technique.
Even today, if you walk through old Japanese moss gardens, the living proof is everywhere:
moss blending naturally across stones, creeping between cracks, and slowly colonizing entire surfaces over time.
Unlike square-cut decorative moss sheets, Maki-goke creates softer, more organic growth patterns that feel naturally integrated into the landscape.
Why Moss Can Grow Back From Tiny Pieces

Moss behaves very differently from most normal plants.
Many moss species can regenerate from tiny living fragments when they receive:
- moisture
- surface contact
- humidity
- indirect light
This is why even loose pieces of moss trapped on rocks or driftwood in nature can eventually start spreading into larger colonies.
Instead of thinking about moss as a plant you “place,” it is sometimes more accurate to think of it as a living surface that slowly colonizes an environment.
That is also why this technique feels so rewarding.
You are not creating an instant finished product.
You are creating conditions for slow living growth.
A Fun DIY Experiment You Can Try At Home

The beautiful thing about Maki-goke is that it does not require expensive equipment or perfect technique.
You can experiment with:
- rocks
- driftwood
- shallow trays
- terrariums
- humid moss boxes
- paludariums
using only a small amount of moss.
A very simple beginner version looks something like this:
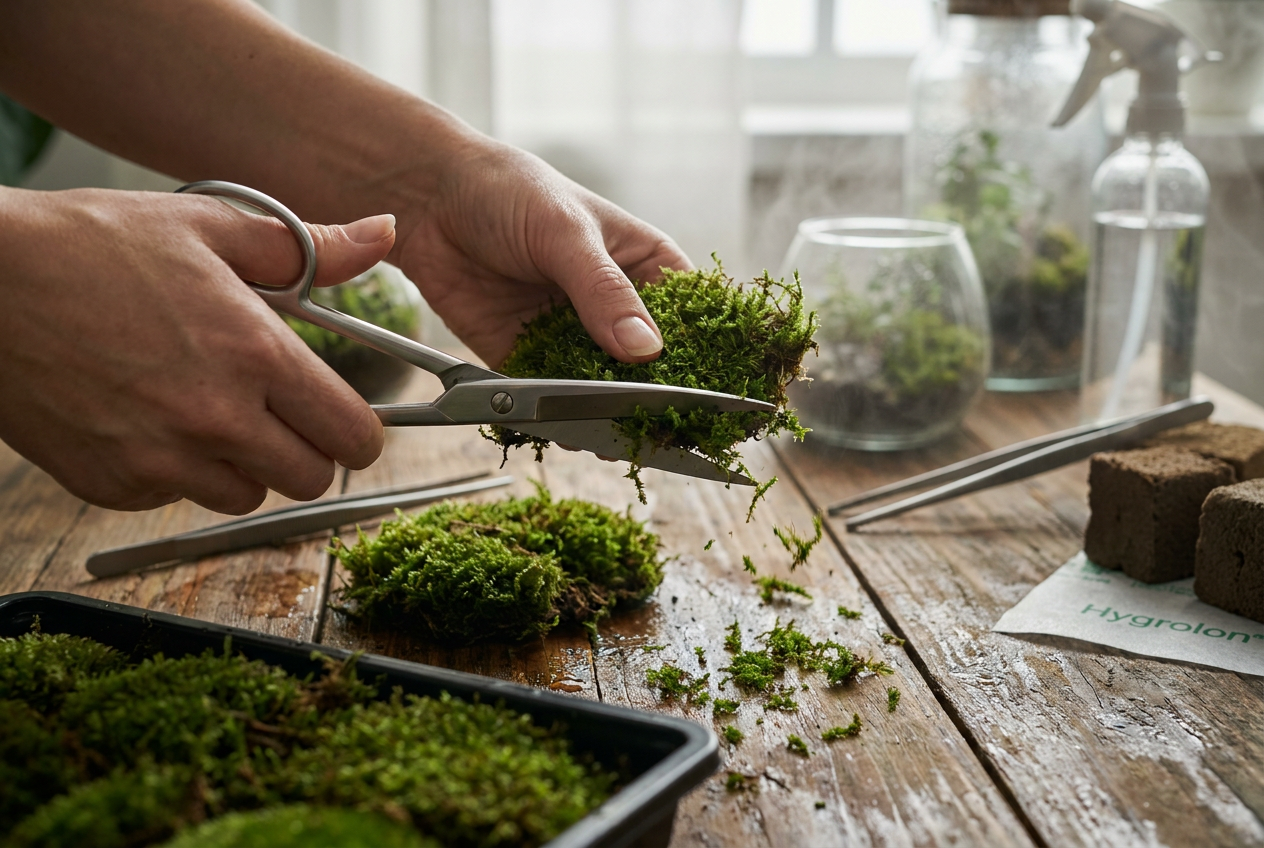
- Take healthy live moss
- Chop or shred it into small fragments
- Prepare a damp growing surface
- Sprinkle or press the moss fragments onto it
- Keep the environment humid
- Wait and observe
That is really the magic of it.
The fun comes from watching tiny green patches slowly appear over the following weeks and months.
Building Moss Carpets On The Floor

One of the easiest ways to try this method is on the floor of a terrarium or humid enclosure.
Because gravity helps hold the moss in place, floor carpets are generally easier than vertical moss walls.
The biggest challenge is not dryness —
it is excessive moisture and stagnant conditions.
If the substrate becomes waterlogged, the moss fragments often turn brown and mushy before they can establish themselves.
A good setup usually includes:
- a drainage layer using lava rock or LECA
- a mesh separator
- a damp but breathable substrate layer above
Once the surface is moist, the chopped moss fragments can simply be sprinkled over the top and gently pressed into the substrate.
The pressing step is surprisingly important because it helps the fragments maintain direct contact with the damp surface.
Growing Vertical Moss Walls

This is where things become especially interesting.
Modern hobbyists adapted the old Maki-goke concept into vertical moss walls for:
- terrariums
- paludariums
- ripariums
- waterfall backgrounds
- humid vivariums
But vertical walls introduce completely different challenges.
Now the enemy is no longer stagnant water.
It becomes:
- gravity
- drying out
- washout from waterfalls
- lack of surface contact
Because of this, hobbyists often use moisture-retaining materials like:
- hygrolon
- tree fern fiber
- cork bark
- textured foam walls
- peat clay
- Terra Base style clay mixtures
instead of simply sprinkling moss directly onto bare surfaces.
The Moss Paste Method

For vertical surfaces, chopped moss is often mixed into a soft paste.
This paste usually contains:
- chopped moss
- distilled water
- powdered sphagnum moss
- peat clay or aquasoil powder
The goal is not to “glue” the moss permanently.
Instead, the paste acts as:
- a moisture buffer
- an anchoring layer
- a temporary nursery bed
The mixture is then gently smeared onto:
- hygrolon
- rock cracks
- driftwood
- textured walls
- splash zones near waterfalls
Over time, the moss fragments slowly begin attaching and spreading across the surface.
One Important Mistake Beginners Make

Many people assume:
“More water means faster moss growth.”
Unfortunately, that often causes failure.
Freshly applied moss fragments are surprisingly delicate.
Strong waterfalls or heavy water flow can:
- wash the fragments away
- break surface contact
- oversaturate the moss
- trigger rot and mold
During the first few weeks, gentle misting usually works much better than aggressive water flow.
For paludariums, the best areas are often “splash zones” —
surfaces that stay constantly humid without becoming fully submerged.
Mold, Airflow & Springtails

The first month is usually the messiest stage.
Because the setup is humid and full of organic material, mold often appears before the moss fully establishes itself.
This is normal.
One of the easiest natural solutions is introducing springtails — tiny beneficial cleanup insects commonly used in bioactive terrariums.
They help consume mold and decaying organic material without harming the moss.
Good airflow also matters.
Even in enclosed terrariums, opening the tank briefly each day helps reduce stagnant air buildup.