The 60-Minute Masterpiece: Plug-n-Play Scaping with Wabi Kusa
This guide is created by Green Chapter — Nature Workshop Studio, where we focus on creating living ecosystems through hands-on experience. We share practical insights across terrariums, aquascaping, plants, and natural systems to help you build and care for your own.
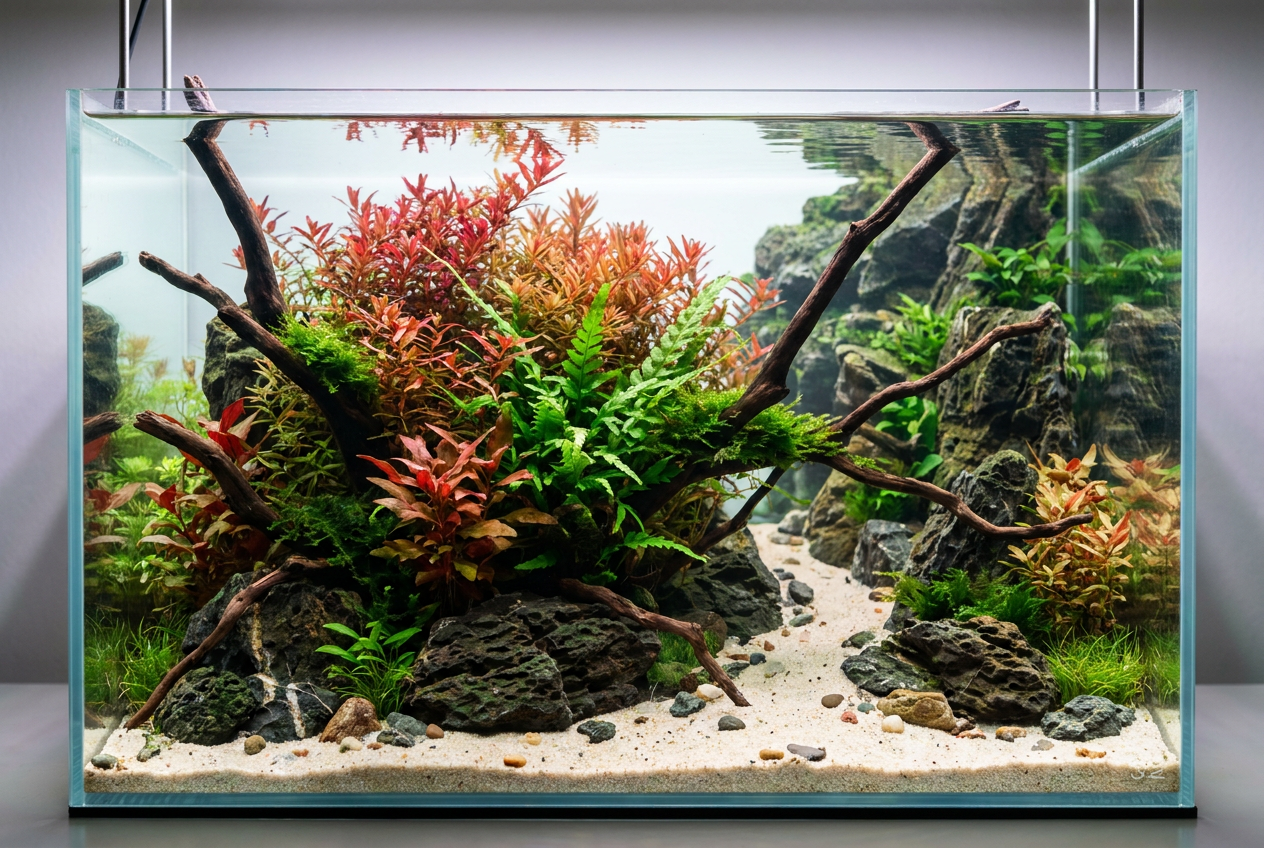
The 60-Minute Masterpiece: Plug-n-Play Scaping with Wabi Kusa
For many hobbyists, the hardest part of creating a beautiful planted tank is not the imagination. It is the time, technique, and patience needed to bring the layout to life.
Traditional aquascaping often involves arranging rocks and wood, tying moss, planting tiny stems with tweezers, waiting for plants to root, and managing the early transition period. For beginners, this can feel intimidating. For busy hobbyists, it can simply take too long.
That is where plug-n-play scaping with Wabi Kusa becomes useful.
By combining a ready-designed hardscape with mature Wabi Kusa, you can create a lush planted layout much faster, with less planting stress and a more established look from the beginning.
What Is Plug-n-Play Scaping?
Plug-n-play scaping is a shortcut method for building a planted tank using two main elements:
- A designed hardscape layout
- Ready-grown Wabi Kusa plant balls
Instead of planting every stem one by one, the Wabi Kusa is placed directly into the layout. The plants are already growing from a nutrient-rich substrate ball, so the tank looks fuller from day one.
This approach is especially useful for people who want a beautiful planted tank without going through a long setup process.
Start with the Hardscape
The hardscape is the foundation of the layout. It gives the aquarium structure, depth, and direction before any plants are added.
You can use a ready-made hardscape kit or follow a classic aquascape layout style.
The Island Layout
The island layout places the main rocks and wood in the center of the tank. This creates a strong focal point and works well for compact planted tanks.
The Triangle Layout
The triangle layout slopes from one side to the other. One side is taller and heavier, while the opposite side becomes lower and more open. This creates movement and flow.
The U-Shape Layout
The U-shape layout keeps the center open, often forming a path or valley. This gives the tank a stronger sense of depth and makes it feel larger.

Before adding Wabi Kusa, position your rocks and wood first. Look for natural pockets, gaps, or cradles between the hardscape pieces. These are the areas where the Wabi Kusa can sit securely without rolling around.
Why Wabi Kusa Works So Well
Wabi Kusa are compact substrate balls planted with established aquatic or marginal plants. Instead of loose roots, the plant mass is already held together in its own growing base.
This gives several advantages.
The biggest benefit is zero planting stress. You do not need to bury tiny roots into soil or gravel. You simply place the Wabi Kusa into the chosen position.
The second benefit is instant density. A newly planted aquarium often looks sparse in the beginning, but Wabi Kusa already has plant volume. This helps the tank look more mature immediately.
The third benefit is root protection. Because the roots are already growing inside the substrate ball, they are less disturbed during setup. This can reduce the chance of plant melt compared with freshly planted stems.

Step-by-Step Setup
1. Dry Layout
Place your rocks and driftwood into the empty tank. Adjust the composition until the layout feels stable and balanced.
Create small pockets where the Wabi Kusa can sit naturally.
2. Add Cosmetic Sand
Add decorative sand or fine gravel to the foreground, open areas, or pathway. This helps complete the look and gives the layout a cleaner finish.
3. Place the Wabi Kusa
Nestle the Wabi Kusa balls into the prepared pockets. Make sure each one sits firmly against rocks, wood, or substrate so it does not move when the tank is filled.
4. Fill Slowly
Slow-fill the aquarium with water. Use a plastic bag, plate, or gentle water flow to avoid disturbing the sand and layout.
5. Start the Equipment
Switch on the light and filter. Once filled, the aquarium should already look lush, planted, and established.

Why This Method Is Beginner-Friendly
This method works because the plants are already established before they enter the aquarium. They are not relying entirely on the tank substrate to begin growing.
For beginners, this removes one of the most difficult parts of planted tank setup: planting delicate roots and waiting for the layout to fill in.
For busy hobbyists, it offers a faster route to a beautiful tank.
For interior spaces, it works well because the aquarium can look presentable almost immediately.
Best For
Plug-n-play Wabi Kusa scaping is especially suitable for:
Busy hobbyists who want a planted tank without a long setup process.
Beginners who feel uncomfortable planting individual stems.
Small display tanks where instant impact matters.
Aquatic interior design projects where the aquarium needs to look good quickly.
Final Thoughts
A beautiful planted tank does not always need to start from scratch.
By using designed hardscape and ready-grown Wabi Kusa, you can create a lush aquascape faster, with less stress and fewer technical steps.
It is not a replacement for traditional aquascaping, but it is a smart shortcut for anyone who wants a natural planted aquarium with instant impact.
