
How to Maintain and Upgrade a Mature Isopod Terrarium
This guide is created by Green Chapter — Nature Workshop Studio, where we focus on creating living ecosystems through hands-on experience. We share practical insights across terrariums, aquascaping, plants, and natural systems to help you build and care for your own.
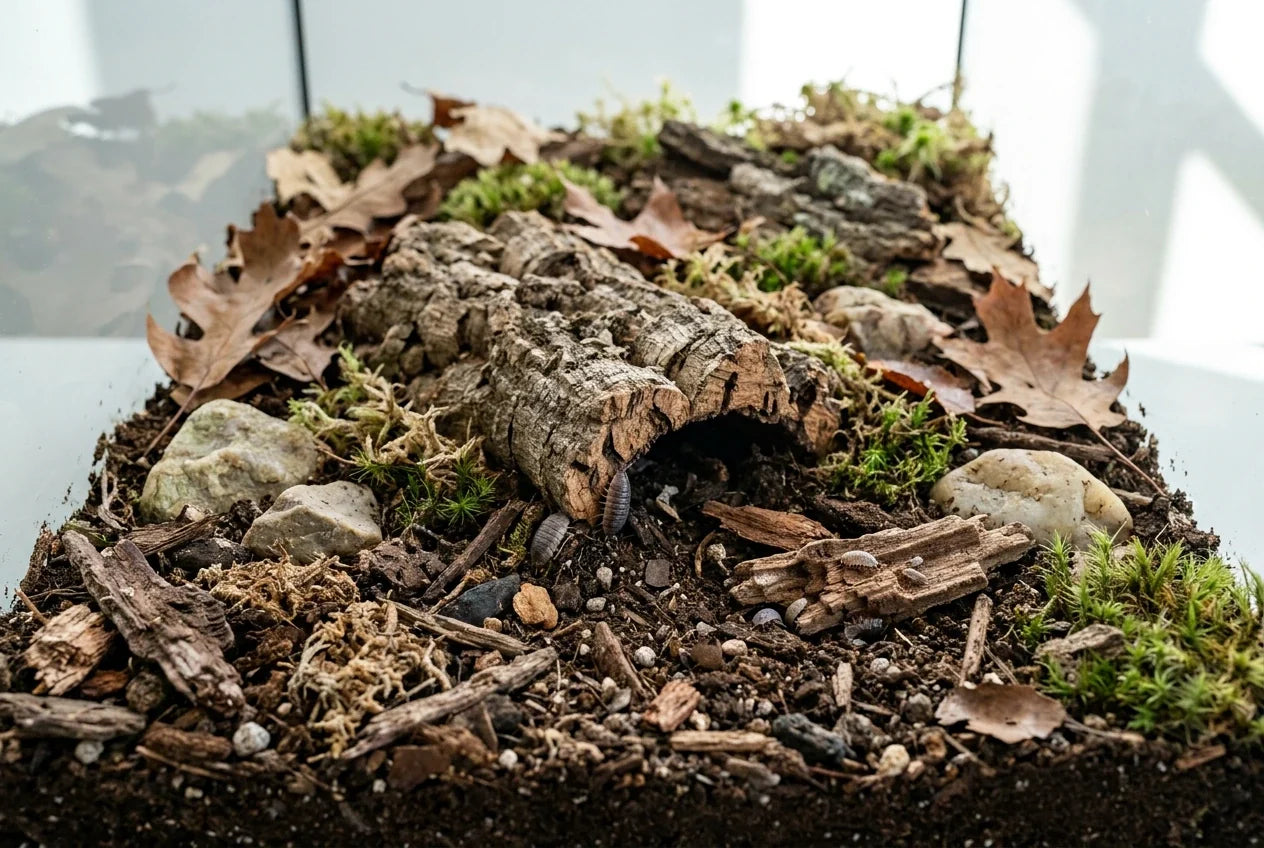
Setting up an isopod terrarium is relatively straightforward. Provide suitable substrate, leaf litter, decaying wood, shelter, calcium and the correct moisture conditions, and a healthy colony can establish itself surprisingly quickly.
But an isopod terrarium does not remain the same after it is built.
Leaves disappear. Wood slowly breaks down. Isopods produce frass. The colony grows. Fine organic material accumulates. Parts of the substrate may gradually compact, while mineral and food resources are continuously consumed.
This creates a different challenge for the keeper:
When should you leave a mature terrarium alone, when should you replenish it, and when does it actually need refreshing?
For an established colony, better husbandry is not about rebuilding the enclosure on a fixed schedule. It is about learning to read how the ecosystem is changing.

1. A Successful Isopod Terrarium Is Constantly Changing
An isopod enclosure is essentially a small decomposition system.
Isopods and associated microorganisms continuously process dead plant material. Leaf litter becomes fragmented. Decaying wood is consumed. Organic material becomes progressively finer and eventually contributes to the substrate itself.
At the same time, the colony produces frass and continues reproducing.
A young enclosure may therefore look quite different after many months of successful operation.
You may notice:
- leaf litter becoming thinner;
- rotten wood gradually disappearing;
- increasing amounts of fine frass;
- substrate becoming finer or more compact in heavily occupied areas;
- calcium and mineral sources being consumed;
- a much larger population than when the enclosure was first established.
None of these automatically means something is wrong.
In fact, many are signs that the biological system is working.
Old substrate is not necessarily bad substrate
A mature substrate contains much more than the ingredients originally used to build it. It develops microbial and fungal communities and contains partially decomposed organic material that has become part of the colony's environment.
This is why completely replacing substrate simply because it is "old" can be unnecessarily disruptive.
The better question is:
Is the substrate still functioning properly?
2. Don't Reset by Calendar — Read the System
There is no universal date at which every isopod terrarium should be dismantled.
A small enclosure containing a rapidly growing colony can accumulate waste and consume resources much faster than a large enclosure containing relatively few isopods. Species, temperature, feeding, substrate depth, ventilation and moisture management can also change how quickly an enclosure matures.
Instead of counting months, look for physical and biological signs.
Is Your Isopod System Still Healthy?
| System condition | What you may notice | What to do |
|---|---|---|
| HEALTHY — Maintain | Normal earthy smell, substrate retains structure, predictable moisture gradient, active colony, juveniles present | Replenish leaves, wood, calcium and other depleted resources. Avoid unnecessary disturbance. |
| MATURING — Partial Refresh | Heavy frass accumulation, local compaction, depleted organic material, substrate becoming increasingly fine, moisture becoming harder to manage | Replace affected sections while retaining healthy mature substrate elsewhere. |
| PROBLEM — Investigate & Reset | Persistent foul or anaerobic smell, badly waterlogged substrate, repeated unexplained mortality, suspected contamination or severe uncontrolled pest problems | Identify the cause first. Correct the underlying problem and replace as much substrate as necessary. |

Does finding a dead isopod mean the substrate needs changing?
Usually, no.
Individual isopods eventually die, and finding an occasional dead adult in an established colony is not enough to diagnose a failing enclosure.
Patterns are more useful than individual events.
Several unexplained deaths occurring together deserve attention, particularly when accompanied by other changes such as abnormal smell, waterlogging, unusual behaviour or deterioration of substrate structure.
Even then, don't immediately assume the substrate is responsible. Excessive heat, dehydration, flooding, contaminated materials, inappropriate food or other environmental problems can also cause mortality.
Diagnose first. Reset second.
3. Maintain Before You Replace
A mature isopod terrarium should generally be maintained progressively.
Think of intervention as a sequence:
Top Up → Replenish → Spot Clean → Partial Refresh → Major Reset
Start with the least disruptive solution.
If leaf litter is disappearing, add more leaf litter.
If rotten wood is being consumed, replenish it.
If the calcium source has been heavily grazed, replace it.
If one corner contains excessive food waste, clean that area rather than dismantling the entire enclosure.
If a particular section of substrate has become compacted and frass-heavy, refresh that section.
Don't try to make the enclosure sterile
Frass, fungi and decomposition are normal parts of a detritivore ecosystem.
The objective is not to create perfectly clean soil.
The objective is to maintain a substrate that continues to provide appropriate structure, moisture, organic material and biological activity without allowing local conditions to deteriorate.
4. When a Partial Substrate Refresh Makes Sense
A partial refresh is often less disruptive than replacing everything.
It allows the keeper to remove deteriorated material while preserving much of the established environment.
When refreshing:
- Carefully inspect the area for isopods and tiny mancae before removing substrate.
- Remove the most compacted, excessively frass-heavy or otherwise problematic material.
- Retain healthy mature substrate elsewhere in the enclosure.
- Add fresh substrate to replace what was removed.
- Replenish decomposing wood and leaf material where necessary.
- Restore surface shelters and moisture conditions.
- Allow the fresh and mature substrate to gradually integrate.
Young isopods can be extremely small and easily overlooked, so substrate should never simply be scooped out and discarded without inspection.
5. Use a Refresh as an Opportunity to Improve the Substrate
Once part of the enclosure is already being refreshed, you can also reconsider how the substrate is constructed.
The foundation remains familiar:
Organic substrate + decaying leaves + rotten wood
These are more important than any specialist additive.
However, an intermediate keeper may choose to incorporate additional materials for particular functions.
Activated Carbon as a Substrate Amendment
A small amount of granular activated carbon can be mixed through fresh substrate during construction or a partial refresh.
Activated carbon has a highly porous structure and adsorptive properties. Within an isopod substrate, it can therefore be used as an additional porous substrate component.
It should not, however, be treated as a substitute for good husbandry.
Activated carbon does not eliminate the need to control moisture, avoid excessive feeding, maintain ventilation or refresh deteriorated substrate when necessary.
Think of it as one optional component of the substrate, rather than a waste-removal solution.
Adding a Mineral Component
Mineral materials can also be incorporated into the system.
For example, Benibachi Mironekuton Powder can be used conservatively as a mineral amendment within fresh substrate, while larger Mironekuton Rock pieces can be placed on the surface where they remain accessible.
This does not replace a conventional calcium source such as cuttlebone. Instead, it creates another mineral component within the habitat.
What About Benibachi Bee Max 2?
Benibachi Bee Max 2 is primarily an aquarium product containing bacterial/enzymatic components and chitosan.
For terrestrial isopod systems, incorporating a very small quantity into fresh substrate should therefore be regarded as an adapted husbandry application rather than a standard requirement or the manufacturer's primary intended use.
For keepers experimenting with this approach, use it conservatively. A successful isopod substrate should never depend on powdered additives to compensate for inadequate leaf litter, rotten wood or substrate structure.

6. Look Above the Substrate Too
Improving an isopod enclosure isn't only about what is mixed into the soil.
The surface is where much of the colony's everyday feeding, sheltering and moisture-seeking behaviour occurs.
A well-developed surface can contain several functional materials:
Leaf litter
The fundamental food resource. Ideally, there should always be enough that portions of the substrate remain covered.
Rotten wood
Another important long-term food source and structural material.
Cork bark
Creates protected spaces and useful gradients between exposed and sheltered areas.
Calcium source
Cuttlebone or another appropriate calcium source should remain available.
Mineral material
A product such as Mironekuton Rock can provide an additional mineral component alongside conventional calcium sources.
Shelters
Small cavities and dark protected spaces allow isopods to choose suitable microclimates, particularly during moulting and reproduction.
The substrate supports the ecological foundation.
The surface gives the colony choices.

7. Move From “Feeding” to a Feeding Regime
Many beginner colonies are fed according to a simple rule:
Give them some food occasionally.
As a colony becomes established, feeding can become more deliberate.
This does not mean feeding more.
It means understanding what each supplementary food contributes.
The natural diet remains the foundation
Leaf litter and decaying wood should remain continuously available.
Specialist foods are supplements to this ecological diet—not replacements for it.
Once that foundation is established, supplementary foods can be rotated according to purpose.
| Feeding objective | Example supplementary food |
|---|---|
| Plant matter & fibre | Benibachi Dry Spinach |
| Seaweed-based nutrition | Benibachi Komb Food |
| Protein supplementation | Benibachi SP / Protein Food |
| Mineral supplementation | Mironekuton |
| Specialised conditioning / carotenoid supplementation | Benibachi Red Bee Ambitious |
This is a more useful way of understanding a range such as Benibachi.
Instead of asking:
"Which food should I feed every day?"
ask:
"What am I trying to supplement?"
8. More Foods Shouldn't Mean More Feeding
Buying several supplementary foods does not mean all of them should be added at once.
Overfeeding introduces more decomposable organic material than the colony can consume. In a warm, humid enclosure, uneaten supplementary food can quickly encourage mould, mites, flies and undesirable localised decomposition.
A better approach is rotation.
For example:
Natural foundation:
Leaf litter + rotten wood continuously available
Supplementary rotation:
Plant-based feed → protein feed → seaweed-based feed → repeat according to colony needs and consumption
Mineral sources can remain separately available according to the product and method being used.
The exact quantity should be determined by colony size and how quickly food disappears, rather than a rigid universal dose.
Start small.
You can always provide more.
Use a feeding area
Powders and concentrated foods are particularly useful when offered in a controlled location such as a small feeding dish, slate or dry section of cork.
This makes consumption easier to observe and leftovers easier to remove.

9. Learn the Rhythm of an Established Colony
Once an enclosure is mature, maintenance becomes much more observational.
Regularly
Check the moisture gradient.
Observe where the colony congregates.
Keep leaf litter available.
Make sure rotten wood remains present.
Check supplementary food consumption.
Remove problematic uneaten foods.
Periodically
Look beneath shelters.
Check how much frass has accumulated.
Feel whether the substrate still has structure.
Inspect calcium and mineral sources.
Watch for juveniles.
Consider whether increasing colony density requires more space or splitting the colony.
When something changes
Don't immediately rebuild.
Ask what changed.
Is the enclosure drying faster?
Has one area become permanently saturated?
Has the population increased dramatically?
Has feeding increased?
Is the substrate compacting?
Are deaths becoming unusually frequent?
That process of observation is what separates routine maintenance from unnecessary intervention.
10. From Keeping Isopods to Managing an Ecosystem
A beginner learns what to put inside an isopod terrarium.
The next stage is understanding why those materials are there, how they change and when they need attention.
A successful mature enclosure does not need to look newly constructed.
Leaves will be eaten. Wood will decay. Frass will accumulate. Microorganisms and fungi will develop. The colony itself will change the environment.
That is part of the system.
The objective is therefore not to continually reset the enclosure.
It is to recognise when you can simply maintain, when you should partially refresh, and when there is enough evidence to justify a more substantial reset.
From there, materials such as activated carbon, mineral amendments and specialist foods can be introduced for specific purposes rather than simply added because they are available.
Build the habitat first. Then learn to manage how it matures.


