
Setting Up My First Slime Mold Habitat
This guide is created by Green Chapter — Nature Workshop Studio, where we focus on creating living ecosystems through hands-on experience. We share practical insights across terrariums, aquascaping, plants, and natural systems to help you build and care for your own.
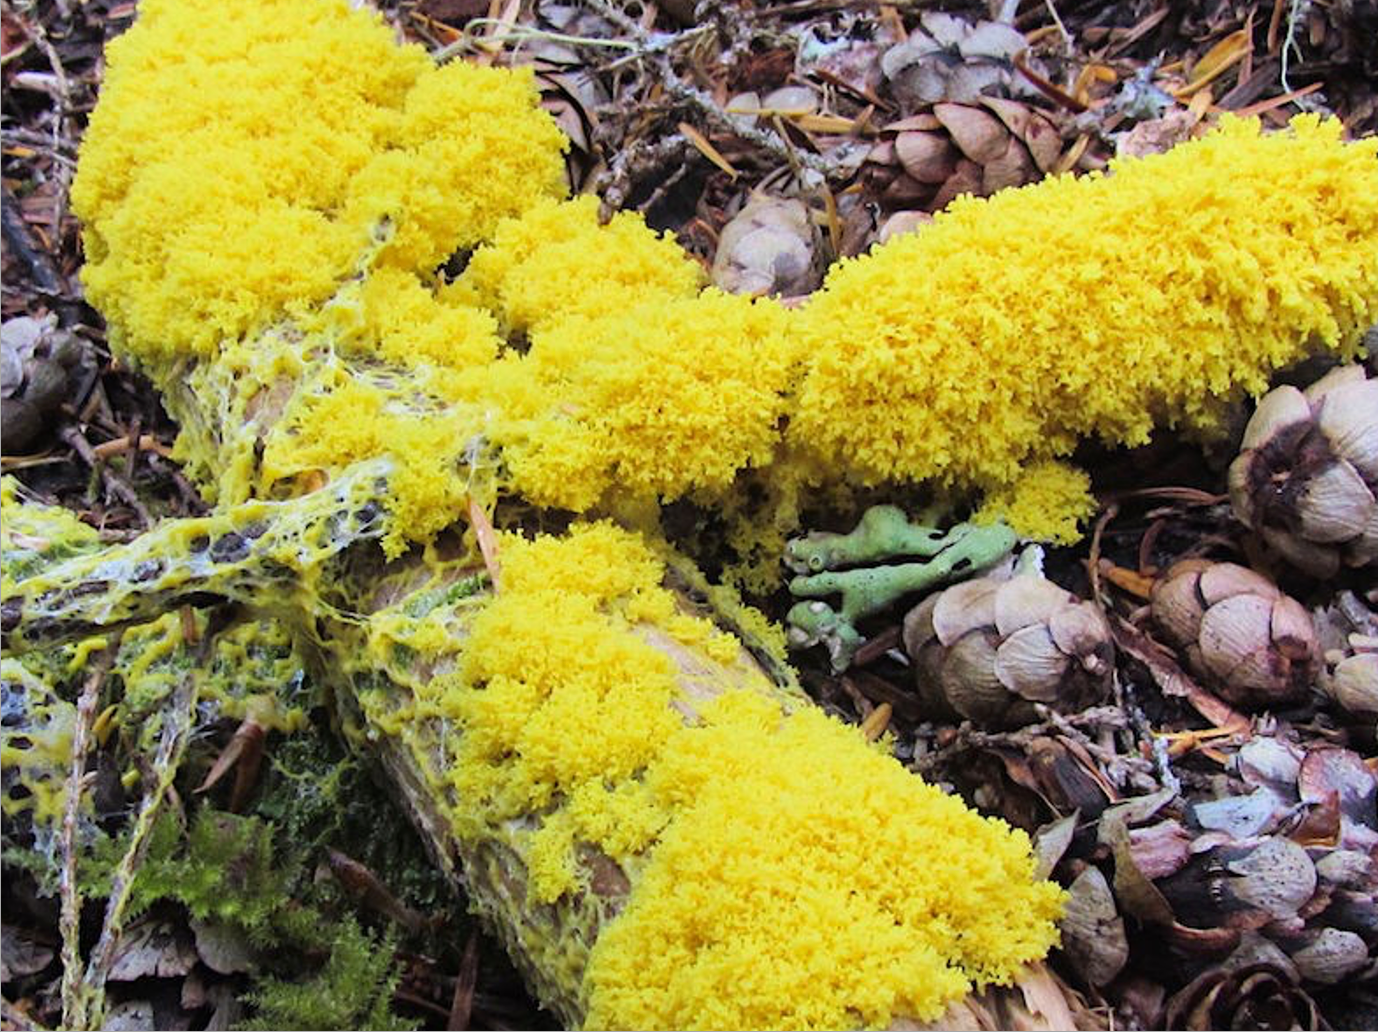
Slime Mold - A General Guide
Slime Molds thrive in environments similar to mushrooms and other fungi, preferring damp and dark conditions. As decomposers, they play an important ecological role by breaking down dead plants, animals, and organic waste into simpler nutrients, enriching the soil and improving compost quality for plant growth.
They can climb any surface, so as long the core is active while they are growing.
Soil / Plants / Figurines
Use substrates such as clean soil or cocopeat with optional plants. Decorative figurines can be placed inside the tank to create a more engaging and distinctive display, allowing you to observe how the Slime Mold gradually spreads around and over them.
Forage
Scatter a few decomposing leaves and small twigs to mimic a natural environment. These materials can also serve as an occasional food source for them.
Compost
If you are producing your own compost or intend to start, consider introducing Slime Molds into it, as they can enhance the overall quality of the resulting fertilizer.
Feeding
For a small setup, you can use damp sphagnum moss to provide moisture, or simply maintain humidity by lightly misting the environment.
Dust a small amount of mushroom powder or yeast as their primary food source. If you are maintaining them on an agar medium, rolled oats are also an effective option.
Setting up Your Slime Mold Jelly Habitat Starter Kit for the first time
Care Guide for Slime Mold (Physarum Polycephalum)
What is in the Starter Kit:
- 1 x Tub of Jelly Habitat (Hardened Agar)
- 3 x Slime Disc (Dried Slime Card)
- 1 x Oats in a Ziplock bag
- 1 x Mesh filter in Ziplock bag
- 1 x Instruction
Revival
To reawaken the Slime Mold from its dormant state, place one or two drops of water onto the Slime Disc and allow time for it to reactivate and begin growing. Once it has developed slightly, position a fresh oat nearby to provide a food source for continued growth.
-Revival Time: 2-12hrs
Step by Step I
Step 1: Take a piece of the Slime Disc and trim off any areas that are not covered by slime, keeping only the slime-inoculated paper. Place the trimmed piece onto the solidified agar and add 2–3 small drops of clean water to help speed up the activation process.
Step 2: Cut a small rectangular opening in the container lid and secure the mesh filter over it using glue or tape.
*Children below 12 years old should carry out the cutting step under adult supervision.
Step 3: Close the lid and allow the slime card to absorb moisture from the agar. Wait about 2–12 hours for activation.
*Activation may take longer depending on the slime disc. Successful activation is indicated when a visibly bright yellow slime begins to emerge and gradually spread onto the agar surface.
Step 4: Once growth begins, place a rolled oat next to the slime.
Step 5: After the oat is fully covered, add more oats around it to encourage further spreading.
FAQ:
-
How do I maintain the Jelly Habitat?
Slime Molds grown on an agar setup require consistent care to remain healthy. Inspect them every 2–3 days, and if any oat becomes soft or spoiled, remove it and replace it with a fresh oat in the same location.
-
How do i keep the slime culture healthy?
If any unwanted white fungal mold or bacterial growth appears, promptly and carefully remove it to prevent competition with the slime mold.
-
How do i know its time to change a new Jelly Habitat?
A healthy slime colony grown on an agar setup can typically last up to 1–2 weeks before it needs to be transferred to a fresh agar container. If a thin or thick creamy layer develops on the agar, this indicates bacterial growth. If this bacterium covers more than 40% of the agar surface, it is time to change.
-
What is the lifespan of a Jelly Habitat?
1-2 Weeks
-
Should i propagate into another Jelly Habitat and why?
Yes, you should. To maximise the success of your slime colonies, it is recommended to maintain at least 2–3 additional boxes. This increases their overall survival rate and minimises the risk of a total loss in the event that one agar container fails.
-
Can i buy the food easily from a grocery store?
Yes, it is possible. Slime mould can feed on a variety of food sources to support its growth. Below is a list of suitable options:
-Rolled Oats
-Uncooked Rice
-Mushroom Powder
-Yeast
-Unflavoured biscuit
-King Oyster Mushroom (not recommended due to smell) -
My Jelly Habitat is contaminated. How do i make a new one?
Agar can be purchased from most local supermarkets. Ensure that it is food-grade and unflavoured to avoid attracting pests such as ants or flies.
-To prepare, mix 1 part agar with 3 parts water. Heat the mixture until the agar completely dissolves and the solution becomes thick and gelatinous. Let it cool slightly in the pot, then pour it into a container to set and solidify.
-
How and When do i use the Jelly Habitat prepared by myself?
After the agar has fully solidified, place a slime-coated oat onto the new agar surface to transfer the culture.
-
How do i keep the slime culture healthy?
If any unwanted white or bacteria appear, carefully remove it to prevent it from competing with the Slime Mold.
-
How long can my self-prepared Jelly Habitat last?
If the Jelly Habitat is well sterilized, it can last up to 2 weeks.


